Node.js/Webserver

-
30min

- mittel

- JavaScript
- Hauptartikel HTTP/Einsteiger-Tutorial
Die für eine Response nötige Software fällt im Allgemeinen in zwei Kategorien: Frontend und Backend.
- Das clientseitige Frontend wird aus HTML, CSS und, falls Interaktivität nötig ist, JavaScript zusammengebaut.
- Das serverseitige Backend befasst sich mit dem Austausch, der Verarbeitung und Speicherung von Daten auf dem Server.
Mit Node.js können Sie JavaScript auch im Backend auf dem Server nutzen.
In diesem Tutorial lernen Sie, wie Sie einen Webserver mit dem in Node.js schon enthaltenen http-Modul einrichten können. Das Beispiel basiert auf einem Konzept von Jared Wilcurt, das auf github zu finden ist.
Inhaltsverzeichnis
Mein erster Webserver
Node.js hat ein eingebautes Modul namens HTTP, das es Node.js ermöglicht, Daten über das Hyper Text Transfer Protocol (HTTP) zu übertragen.
Um das HTTP-Modul einzubinden, verwende die require()-Methode.[1] Es hat sich als Konvention etabliert, dass die Variable dem Namen des eingebundenen Moduls entspricht.
 1 const http = require('http'),
 2       port = 8080;
 3
 4 http.createServer((request, response) => {
 5   response.writeHead(200, {
 6     'Content-Type': 'text/plain'
 7   });
 8   response.write('Server funzt!\n');
 9   response.end();
10 }).listen(port);
Die createServer()-Funktion erzeugt einen HTTP Server, der sich um die erforderliche Netzwerkfunktionalität kümmert. Die Funktion erwartet ein Options-Objekt, das aber auch weggelassen werden kann, sowie eine Funktion zur Behandlung von ankommenden Anfragen (Requests).
createServer() startet den Server noch nicht, dieser Aufruf erzeugt lediglich ein http.Server-Objekt. Dieses besitzt eine Methode listen, der man den gewünschen Port übergibt und die dann im Hintergrund die einlaufenden HTTP-Requests verarbeitet. Für HTTP ist normalerweise der Port 80 festgelegt, aber wir verwenden im Beispiel den Port 8080, der als alternativer Port für HTTP-Verbindungen definiert ist und für lokale Tests gern genutzt wird.[2]
In unserem Beispiel wird das Server-Objekt nicht gespeichert. Es wird erzeugt, dann wird gleich listen() darauf aufgerufen und damit ist der Programmcode eigentlich am Ende. Weitere Zugriffe auf das Server-Objekt sind nicht mehr möglich – das ist für diesen einfachen Fall aber auch nicht erforderlich. Solange der Server läuft, beendet Node.js sich nicht. Drückt man im Konsolenfenster Ctrl+C, wird das Programm abgebrochen und Node.js bricht auch den Server ab.
Für jeden Request wird die Funktion aufgerufen, die man bei createServer() angegeben hat. Ihr werden zwei Parameter übergeben:
- request
- ein Objekt vom Typ http.IncomingMessage, das alle Daten zur Anfrage enthält und bei POST-Requests auch als Datenquelle dient
- response
- ein Objekt vom Typ http.ServerResponse, auf dem Sie HTTP Statuscodes und HTTP Header setzen können und das Methoden zum Schreiben der HTTP Antwort anbietet
Genau genommen handelt es sich bei dieser Funktion um einen Eventhandler. Der eintreffende Request löst im Server-Objekt ein request-Event aus, und createServer() tut nichts weiter, als die Funktion, die man ihm übergibt, für dieses Event als Behandlungsfunktion zu registrieren.
Zur Behandlung eines request-Events kann man die URL analysieren, man kann den POST-Inhalt auslesen und noch vieles mehr tun, darauf verzichten wir im ersten Beispiel noch und reagieren auf jegliche Anfrage mit einem [Statuscode 200] und der Klartext-Antwort "Server funzt".
Dazu bedienen wir uns des response-Objekts. Die Methode writeHead() erwartet den HTTP Statuscode, optional den HTTP Statustext (den haben wir weggelassen) und – ebenfalls optional – ein Array mit Antwortheadern. Wir setzen den Content-Type Header auf text/plain, weil wir einfachen Klartext zurückgeben wollen.
Die eigentliche Antwort schreiben wir dann mit der Methode write(). Sie erwartet den Inhalt der Antwort als ersten Parameter. Bei ihrem ersten Aufruf werden der HTTP Statuscode und die Header gesendet und im Anschluss der übergebene Inhalt. Mehrere Aufrufe sind möglich, wenn Sie den Inhalt in mehreren Teilen erstellen wollen. Die write() Methode arbeitet asynchron, wartet also nicht, bis die Antwort übertragen ist. Die Inhalte werden von Node.js im Hintergrund in eine Warteschlange gestellt und so gesendet, wie es die Netzwerkverbindung zulässt. Wollten wir eine HTML-Antwort senden, so müsste das vollständige HTML-Dokument von <!doctype html> bis </html> übertragen werden.
Um diesen Hintergrundablauf abzuschließen, ist es zwingend erforderlich, auf dem response-Objekt die Methode end() aufzurufen. Sie beendet den Sendevorgang nicht sofort – das würde der Asynchronität von write() widersprechen –, sondern markiert den Schreibvorgang als abgeschlossen. Weitere write()-Aufrufe sind dann nicht mehr möglich, und Node.js gibt den Speicher für den Antwortvorgang frei, sobald die Übertragung beendet ist.
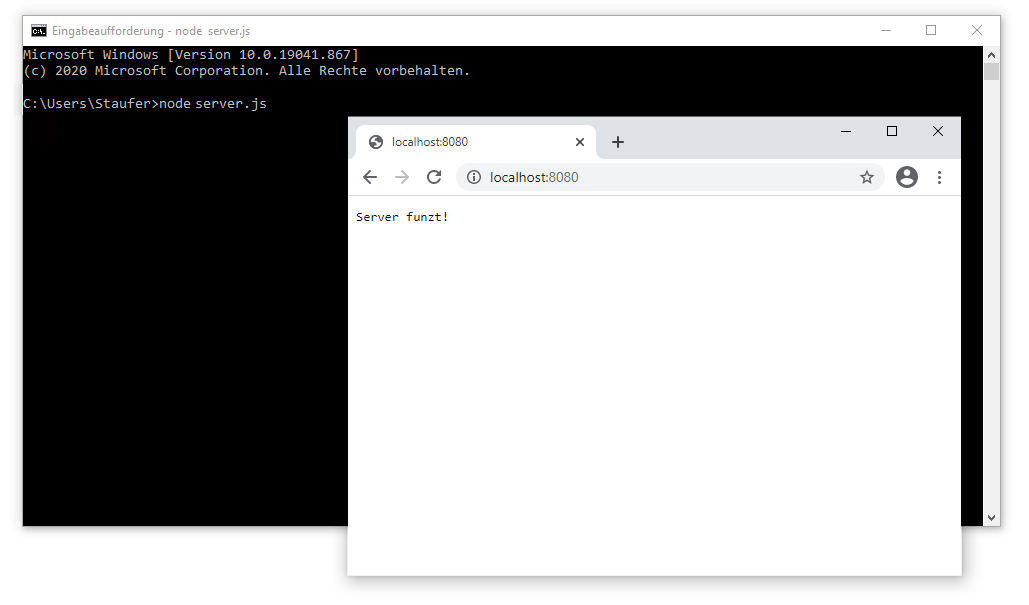
Speichere das Script als server.js und rufe es im Terminal auf.
http://localhost:8080 ein:Die Angabe localhost für die interne IP-Adresse 127.0.0.1 ist nur für den lokalen Computer verfügbar, nicht für die lokalen Netzwerke, mit denen wir verbunden sind, oder gar für das Internet.
Um im Terminal anzuzeigen, dass der Server läuft, können wir eine Meldung ausgeben:
var port = 8080;
...

http.createServer((request, response) => {
...
}).listen(port);

// Nachricht, die im Terminal ausgegeben wird.
console.log('Statischer Webserver läuft auf\n  => http://localhost:' + port + '/\nCTRL + C zum Beenden');
Ausliefern einer Webseite
In einem zweiten Schritt soll unser Webserver nicht nur einen Text, sondern eine komplette Webseite in HTML senden.
 1 const http = require('http');
 2 let port = 8080;
 3
 4 http.createServer((request, response) => {
 5  response.writeHead(200, {
 6  'Content-Type': 'text/html'
 7 });
 8   response.write(`<html><body><h1>Das ist HTML</h1><p>Und das ein Absatz!</p></body></html>`);
 9   response.end();
10 }).listen(port);
11
12 // Nachricht, die im Terminal ausgegeben wird.
13 console.log('Statischer Webserver läuft auf\n  => http://localhost:' + port + '/\nCTRL + C zum Beenden');
In response.writeHead wird der MIME-Type auf text/html geändert.
response.write sendet einen langen String voller HTML-Tags.
Schön ist anders.
Im Normalfall sendet ein Server als Antwort auf eine Anfrage nicht eine Zeichenkette, sondern ein HTML-Dokument und weitere Dateien wie Bilder, PDFs oder Videos. Ob diese als physische Dateien auf dem Server vorhanden sind oder vom Server aus Inhalten einer Datenbank dynamisch zusammengestellt wird, spielt dabei keine Rolle. Diese Aufgabentrennung (engl. Separation of concerns) ermöglicht es, unsere Scripte kürzer und übersichtlicher zu halten.
File System - Dateien schreiben und lesen
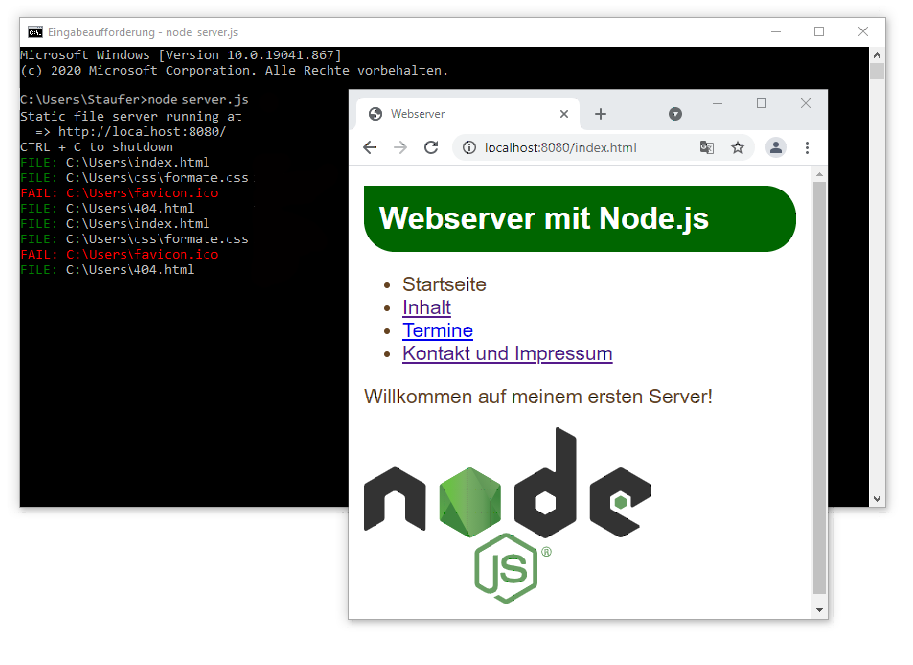
Unser Server wird nun so erweitert, dass er Dokumente mit dem passenden MIME-Type ausliefert. Anfragen ohne entsprechenden Inhalt sollen nicht mit 200 (ok), sondern mit einer Fehlermeldung 404 (not found) beantwortet werden.
JavaScript kann im Browser Dateien weder auslesen noch schreiben, das hat Sicherheitsgründe. Node.js läuft hingegen als Kommandozeilentool oder als Server, deshalb hat es freien Zugriff auf die Ressourcen der Maschine (soweit die Berechtigungen des Benutzers das zulassen). Die Node.js Laufzeitumgebung enthält das File System-Modul, womit synchrone oder asynchrone Zugriffe auf beliebige Dateien möglicht sind.[3] Seit Node v10 gibt es auch ein auf Promises basierendes API.
Das Filesystem wird mit require('fs') eingebunden.
 1 // Require in some of the native stuff that comes with Node
 2 const http = require('http'),
 3       url = require('url'),
 4       path = require('path'),
 5       fs = require('fs'),
 6       port = 8080,                   // Port number to use
 7       WHITE = '\x1b[39m',            // Colors for CLI output
 8       RED = '\x1b[91m',
 9       GREEN = '\x1b[32m';
10
11 // Create the server
12 http.createServer(function (request, response) {
13     // The requested URL, like http://localhost:8000/file.html => /file.html
14     const uri = url.parse(request.url).pathname;
15
16     // Setting up MIME-Type (YOU MAY NEED TO ADD MORE HERE) <--------
17     const contentTypesByExtension = {
18         '.html': 'text/html',
19         '.css':  'text/css',
20         '.js':   'text/javascript',
21         '.json': 'text/json',
22         '.svg':  'image/svg+xml'
23     };
24
25     // get the /file.html from above and then find it from the current folder
26     let filename = path.join(process.cwd(), uri);
27
28     // Check if the requested file exists
29     fs.exists(filename, function (exists) {
30         // If it doesn't
31         if (!exists) {
32             // Output a red error pointing to failed request
33             console.log(RED + 'FAIL: ' + filename);
34             // Redirect the browser to the 404 page
35             filename = path.join(process.cwd(), '/404.html');
36         // If the requested URL is a folder, like http://localhost:8000/catpics
37         } else if (fs.statSync(filename).isDirectory()) {
38             // Output a green line to the console explaining what folder was requested
39             console.log(GREEN + 'FLDR: ' + WHITE + filename);
40             // redirect the user to the index.html in the requested folder
41             filename += '/index.html';
42         }
43
44         // Assuming the file exists, read it
45         fs.readFile(filename, 'binary', function (err, file) {
46             // Output a green line to console explaining the file that will be loaded in the browser
47             console.log(GREEN + 'FILE: ' + WHITE + filename);
48             // If there was an error trying to read the file
49             if (err) {
50                 // Put the error in the browser
51                 response.writeHead(500, {'Content-Type': 'text/plain'});
52                 response.write(err + '\n');
53                 response.end();
54                 return;
55             }
56
57             // Otherwise, declare a headers object and a var for the MIME-Type
58             const headers = {},
59                   contentType = contentTypesByExtension[path.extname(filename)];
60             // If the requested file has a matching MIME-Type
61             if (contentType) {
62                 // Set it in the headers
63                 headers['Content-Type'] = contentType;
64             }
65
66             // Output the read file to the browser for it to load
67             response.writeHead(200, headers);
68             response.write(file, 'binary');
69             response.end();
70         });
71     });
72
73 }).listen(parseInt(port, 10));
74
75 // Confirm running server in terminal
76 console.log(WHITE + 'Static file server running at\n  => http://localhost:' + port + '/\nCTRL + C to shutdown');
Ein solcher Server könnte einfach zu einem HTTPS-Server erweitert werden. Dazu würdest Du aber noch Zertifikate benötigen.[4]
Weblinks
- github:
- npm-Free-Server
This is a very tiny server. Without comments it's 50 lines of code and it's <1KB (minified). - local-web-server
A lean, modular web server for rapid full-stack development.- Supports HTTP, HTTPS and HTTP2.
- Small and 100% personalisable. Load and use only the behaviour required by your project.
- Attach a custom view to personalise how activity is visualised.
- Programmatic and command-line interfaces.
- npm-Free-Server
Quellen
- ↑ Node.js: require()
- ↑ Wikipedia: Liste der Portnummern, abgerufen 29.08.2024
- ↑ Node.js: File System
- ↑ Node.js: How to create an https server?.


